Monday, December 13, 2010

Mission Success...for Me at Least

Part 1:

Phew...I made it back. I wasn't sure if I would, what with all the snow, but here I am. Kraig. Your guest rambler.

Some of you may be thinking, "Why are they letting him back, he didn't even say how to make the bread in the last post? He basically said just throw stuff together?"

Well who asked for your opinion anyway....But you are right. I was just testing to see who was paying attention. But when it comes down to it, I feel like all cooking ever is simply throwing stuff together and hoping it turns out OK.

So for those whining about the last post I hope this helps--Inventory for "Irish" Soda Bread:
-Oil or cooking spray for the baking sheet
-3.5 cups of flour, 0.5 cup uncooked oatmeal, 1 tsp salt, 1 tsp baking powder, 1 tsp baking soda
-8 ounces sour cream, 0.75 cup skim milk, 3 tbsp sugar (mix together separately, then combine with above mixture)
-5 tbsp melted butter (4 for the mixture, 1 to be brushed on top of the bread before putting it in the oven

Now, on to bigger and better things (or so I thought)

Cheddar Cheese Soup-aka. Onion Soup (and some Cheese)

This part of the recipe didn't start out very well for me right from the start.

"Peel two onions and cut into thin slices."

Peel an onion? I know you can peel a banana. Or even peel an apple or orange. But I didn't know you could peel an onion. The only think I knew about onions was that I asked for them to be held when I order a sandwich and I pick them off of my salad.

The problems started even earlier when I was buying the onions. There is more than one kind of onion! Who makes all of these things up anyway? Isn't one type of onion too much? Needless to say I bought two purplish things under a sign that read, "onions."

I didn't know where to start with peeling this thing, so I attacked it like a corn husk. That worked for a bit, but when I got off what I thought was the husk it was still purple. So I decided I should probably peel that off too. I mean everything else looks different after you peel it.

Apparently that's not the case with onions.

So the onions are now more or less peeled (less would be my guess). I sliced them up the best I could (smaller I think is better), decided two full onions was way too much (and too much work), and went ahead and moved on to the next step.

Next, I took 0.25 cup of butter and melted that in a large saucepan. I think it was a saucepan; it could've been a pot, but definitely wasn't a kettle. Anyway, you throw the cut up onions into the saucepan, stir occasionally, and do this over medium heat until the onions are translucent (15-20 min).

Then, it's a bunch of steps in a row so be ready. 0.3333333 (rounded of course) cup of flour added in and stirred constantly for 1 min. Follow that by stirring in 2.5 cups water, 1 vegetable bouillon cube (which I was very sad to find out is not the same as bullion), and 2.5 cups of milk. Bring the mixture to a boil.

After that, season with salt and pepper and simmer over low heat, stirring frequently for 5 min.

At this point I have a few more problems with the recipe. First, what does season mean? Is that a unit of measurement? How much salt and pepper is in a season? Do you pour salt and pepper in until the spring thaw rolls around? I don't like how recipes aren't exact. Tell me how much salt to put in, what temperature medium heat is, and what kind of onion to get. Some people may like the art of cooking, but for those of us who are cooking challenged, we need to be told what to do.

Second, for Cheddar Cheese soup, there is a large amount of cheese that is not in the recipe. But don't fret; that's coming up next.

Remove the saucepan from the heat and mix in 2 heaping cups of grated cheddar cheese (I added the heaping part), stirring until it is completely melted.

Done, and all I smell is onion.

At this point the bread should also be done (you should start making the soup just as you put the bread in the oven). Wait until the bread cools before cutting, or the piece will just crumble apart. Then serve immediately with the soup. It will feed about 4-6 people, depending on the level of hunger of course.

Not to brag, but it was pretty darn good. The soup was a bit too oniony for my taste, but still good. I paired this with a Hofbräu Oktoberfestbier, which was good, but I think a fuller fall beer would go very well with it.

Looking back on this whole experience, I'm glad I tried something new and it does make me want to make this again and "fix" the soup. For hating cooking, this was pretty fun. So thank you Culinary Conquistadors for the encouragement to vanquish some vittles. Keep cooking! (I'll try to stay out of the kitchen, for everyone's protection)

Friday, December 10, 2010

"I'm making....TOAST!" Not really though...

Part 2:

Haha! I tricked them. They are letting me post on their cooking blog "Culinary Conquistadors" and, most of the time, I'm usually getting conquistadored by the culinary.

To introduce myself (the guest blogger) to this world of cooking blogs, I'm Kraig (aka Draig or Reiberger) and the one thing you need to know about me is: I don't cook (I actually fancy myself a photgrapher; check out my blog at Id Est)

For me, preparing a gourmet meal is making a grilled cheese sandwich. I didn't make scrambled eggs for the first time until I was 23. Yes, I know it's embarrassing, but when it comes down to it I don't cook because it takes too long. When I start thinking about food, it's already too late to start cooking. I want food now.

So as far as cooking goes, I'm the microwave master. "Why am I posting on this site?" you ask. Well, I'm living on my own now, I've cut meat out of my diet, and, believe it or not, I'm starting to get sick of pasta and peanut butter and jelly. My hand has been forced, so the following is my feeble attempt at cooking something new. (It turned out to not take too long, was kind of easy, and tasted good.)

Cheddar Cheese Soup with Irish Soda Bread
-or-
Misnomer Bread with Onion Soup (and some Cheese)

This comes out of my vegetarian cook book, and I vastly underestimated it's difficulty (meaning it had more than three steps).

Supposedly, this is how they are made (I don't understand cooking, so this is my interpretation of the cookbook): First, you need to be hungry (and not Hungary, there was some initial confusion about this) because without this there is no drive to make food. Next, you buy lots of items that have never been in your house before (i.e., flour, sugar, baking soda) and will likely never be used again.

As a side note, who knew that there was baking soda and baking powder?! I was also very worried about using baking powder in food. I thought it was only used to make small volcanoes explode and absorb smelly refrigerator smells.

Anyways, the first few steps were easy (and actually, making the bread was surprisingly very easy); throw some flour, uncooked oatmeal, salt, baking powder, and baking soda into a mixing bowl. People typically use mixing bowls, so I'm told, but a large tupperware container works just fine for people who don't have "real" cooking tools...utensils...whatever. Then, in another mixing bowl (i.e. cooking ware container that has never been used before) you put sour cream, skim milk, sugar, and melted butter.

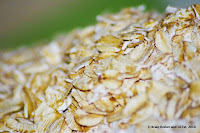
The final step for the bread is to mix the two bowls together. The easiest way to mix it (read the only way I could mix it due to lack of "equipment") is to use your hands. Pour the sour cream mixture over the flour mixture and knead it with your hands. It is really sticky and you will know when it is mixed when all the flour is in the mixture and doesn't stick to your hands as much (it will still stick a lot). You should be able to put it into a cohesive shape. This then goes on to a baking sheet that is lightly coated with oil or cooking spray. (Note: Do this before mixing the bread with your hands or your cooking spray will have stuff all over it. I speak from experience.)

The bread should be put on the baking sheet in a mounded circle about 8 inches in diameter and put in an oven preheated to 375 degrees.

I was absolutely amazed to look in the oven, after 40-45 minutes or until it browns, and see something that resembled bread.


Thus concludes Part Two of our story. Stay tuned for scenes from the next post...

As a bit of an explanation for my title of the recipe: the first part of the cooking process is making the bread, even though it's the second part of the name. As my teachers taught me, the introduction should always follow the order of the story, therefore, I put the bread first in my title. Second, Irish Soda Bread is not Irish. The Native Americans invented it.

...Tune in to the next post for...
"...ONIONS!!!!"..."OMG! I'm making soup."

Tuesday, October 5, 2010

Chili Lime Beef Wraps: A Tale of Love, Loss, and Excuses

Looking at our blog from time to time and calculating the number of days that pass between entries sometimes, I could see how you would think we are lazy and never live up to our promises.

I could see that.

I could see it because, for the most part, you'd be right. A very successful, well-loved businessman in Cleveland, Umberto Fideli, once told me, "Always underpromise and overdeliver." He was speaking to a group of us on the topic of networking at a PR firm at which I was formerly employed. Mr. Fideli is someone that I greatly admire, and I took his words to heart. Why then, do we say that we'll do one thing on this blog and often do another? Well, for a few reasons.

First and foremost, you may have figured out at this point that I am in many ways the "captain" of this blog, having started it and, for the most part, having managed it over the course of its existence. I am not the most entertaining writer and I am not the best cook, but part of running something is knowing when to recruit people more talented than yourself. All of this being said, I get fanciful ideas about how to improve the blog from time to time, and in my zeal I share these ideas with you via blog posts. In my excitement, I often talk to Matty and Deering about how we could pump out more posts, try new recipes, improve our social media presence, and generally kick a bit more ass around here. They nod, say something along the lines of, "sounds good, man", and then go about their lives.

I do not fault my compatriots for being busy people, but the fact of the matter is that we are a bit too disorganized and generally tied-up to get a lot of stuff done around here. It isn't that we don't try - take the subject of this post, for instance. Matty, Britta, and I made "chili lime beef wraps" about a month ago, had a great time making them, and they even tasted pretty darn good. We had our girlfriends over for dinner while we made the wraps; it was a lot of fun. When it was all over, I talked to Matty and asked him to write up the post on the wraps and he agreed to. Here we are a month later now, the recipe has been lost (it was on one of those recipe cards you find around Heinen's or any other grocery store), and he never got around to writing the post.

The chili lime beef wraps were not the first casualty of our forgetfulness... We have made dishes before, some very intricate, expensive ones, even (especially when Deering is involved because he knows what he is doing more than we brothers do); we just forget to write up the posts, lose recipes, or can't recall details until it is too late to rectify the situation.

If you are reading this far and are thinking to yourself, "Boy, this is the longest excuse I've read all day", I feel for you. I'll cut out my ramblings soon enough; I just want to let you guys all know how things work around here. We haven't been fair to our readers, we haven't undertaken enough culinary projects, and we haven't got our crap together as far as organization is concerned. I'll ask that my fellow Conquistadors sign off on this post so that it is not simply one more "pseudo-promise" that we're going to go back on.

I am going to dedicate more time to making sure that this blog is something that I can be proud of at all times.

I know that blogging (at least for the vast majority of people) is about fun, and I intend to keep it that way. This isn't going to become work, but I still want to treat it with respect. I don't see us getting back any of the posts that we've "lost" in the past, but I also don't intend to let any more slip through the cracks. Conquistadors are adventurers, and sometimes you take a wrong turn or fall in a pit of quicksand/snakes/Alamo Soup. You gotta know how to learn from your mistakes and press on, more savvy than you started out.


Fall is a ballin' season and there are a lot of fun recipes (and beer pairings) to go along with it. Let's make the most of it and enjoy the culinary landscape this autumn, together.

Friday, October 1, 2010

Trudging Tacos

"Matty, are we Conquistadors or are we NORMAL people who think ideas through before rushing headlong into things?!"


"... You're right... I'll open the re-fried beans."

~~~~~~~~~~~~~~~~~~~~~~~~~~~~~~~~~~~~~~~~~~~~~

Thus the operation began.


I know that we said we were abandoning "The Best of School Lunch Week" as it was shaping up to be quite deleterious to our health. I do not deny  making these comments (which would be stupid, as they are easily found below this post). We almost were able to walk away, but it was turned out to be too difficult to quell our excitement over one of the items on the proposed list: WALKING TACOS.

Walking tacos are a young child's dream: a food that is crunchy, fattening, delicious, AND is ambulatory!* C'mon, where does putting a wad of meat, cheese, and lettuce in a bag of Doritos** NOT get fun?*** For one reason or another, the state has taken it's dear time cracking down on this old classic; I expect, however, that we'll see walking tacos disappearing off lunch menus soon enough. In anticipation of their imminent departure, let us once more pay our tributes to this simple, saturated snack.
*We have not directly witnessed the tacos walking to-date, but are assured that they do when you aren't looking. **I have also been informed that Fritos are sometimes used as a substitute for Doritos. This is inexcusable and is, I hypothesize, one of those crazy "Indiana" things you hear about on the news all the time. Can't take those people anywhere.***Yes, I am abusing my right to utilize subscripts. Eating walking tacos gets "not fun" when you are suddenly the only kid in gym class who has to sit out of that Star Wars game with the scooters and foam balls because your chubby rear won't fit on one. I can think of no worse punishment, personally.

~~~~~~~~~~~~~~~~~~~~~~~~~~~~~~~~~~~
 
HOW TO MAKE 'EM


Walking tacos are simple beasts to construct.


1. Get Doritos. Generally the small, individual packs are best, but if you want to save a few $ you can get a big bag and just eat off a plate instead of out of the bag. The taste will be the same, but the feeling of endeavoring toward something stupid that brings back such fond memories of childhood (e.g., digging in a tiny bag with a fork for something that a fork really can't pick up to begin with) may be entirely lost on you.


2. You'll want about 1lb. of ground beef or turkey for 6 individual bags of Doritos. I hadn't used turkey until today, but it is a bit healthier than the beef. Yes, yes, I know it's like shooting a wildfire with a Super Soaker and is hardly going to make a difference in a dish like this, but its a self-confidence boost. Brown the meat like you would any other time: put some oil in a skillet, add some chopped onions and maybe a bit of crushed garlic, and let the meat cook through as you poke at it now and then with a spatula. Add a packet of taco seasoning; any brand will do. The whole process shouldn't take much more than 10 minutes.


3. Either buy shredded cheddar cheese or do what we did: buy a big block of it and shred it yourself. Decide how much you'd want on a normal taco and translate that to the walking tacos. 


4. Again, either buy shredded lettuce or a head of lettuce to shred yourself. If you are like us and make a trip to Giant Eagle only to realize that they DO NOT SELL HEADS OF LETTUCE despite months a work to majorly expand their store and selection, you'll have to get the pre-shredded kind and grimace at how lazy you feel.


5. Add additional ingredients if you feel the need; anything that you would put on tacos. We selected a small can of diced green chilies and re-fried beans this time around. If you use re-fried beans, you'll want to heat them first: we put more oil in a second pan and glopped it all in to achieve this (three-fried beans?).


6. Open up your Doritos bag and slop everything in there. You'll feel very little like a foodie and very much like a proud armchair quarterback, but that's just the nature of the "dish".


7. Enjoy, overlooking feelings of guilt by assuring yourself you won't try this again for at least a year.


~~~~~~~~~~~~~~~~~~~~~~~~~~~~~~~~~~~~~~~~~~~~~~~~~~~~~~~~~~~~~~~~~~~~~~~~~~~~~~~~~~~~~~~~~~~~~


Walking tacos are very, very hard to screw up and thus saying, "they were good" seems almost unnecessary. The re-fried beans and chilies were a new addition for me, but that worked out pretty well too. If you're ever looking for something resembling homemade Taco Bell but can't wrangle up legitimate taco shells, this one may be for you. If you've never tried a walking taco, I suggest you do it once... just don't expect to run into them on many non-county fair menus.


If you detect a lack of enthusiasm on my part, it's not your imagination. Walking tacos DO taste delicious and bring back fond childhood memories for sure... I guess I have just come a long way since then. I've been doing my best to be working out, drinking lots of water and eating semi-healthily recently, so it is tough to eat something that just feels bad for me. Matty will probably read this and tell me to suck it up and enjoy things... he certainly enjoyed his share of the eats tonight. Meh. Consider me a wet blanket and go buy you some Doritos.


~~~~~~~~~~~~~~~~~~~~~~~~~~~~~~~~~~~~~~~~~~~~~~~~~~~~~~~~~


On an unrelated note, we've been very behind around here lately... Deering has been a bit of a phantom shifting between towns, Matty is tied up in a lot of extracurriculars/school stuff and I... well I haven't been as good as I could be either. I am looking forward to getting the team together to talk some Conquistador strategy and make some plans for moving forward. Stay tuned as we progress along those notes. Thanks, as always, for sticking with us this far!

Wednesday, August 18, 2010

The Fate of "Best of the School Lunch Week"

We, the Conquistadors, have made a number of questionable decisions in the past... as many of you well know. For those who don't know, watch the video on the Chicken Crab Valentine post.

Among our iffy choices, I would like to rank our most recent idea, "Best of the School Lunch Week". When we came up with the idea, we were excited. After all, there were certain items from a school lunch menu that every child, at least in our generation, should recall savoring. What we also have realized after our first entry is why our nation's school children are probably so obese.

Our proposed entries would have gone something like this:

1. Meatball subs - Meatballs, marinara sauce, and cheese in a bun
2. Walking tacos - Ground beef, cheese and lettuce in a bag of Doritos
3. Pizza - I think you know what this is. We actually made it too - gruyere, blue, cheddar, and mozzarella cheese, chicken and pepperoni pizza to be exact
4. Italian dunkers - Breadsticks covered in cheese, dipped in marinara sauce
5. Footlong hot dogs - Hot dogs that are roughly a foot long.

As we analyzed this list we realized that it may be delicious, but certainly wouldn't do much to help us establish a sightly waistline. Meat of questionable fortitude? Check. Lots of carbohydrates? Check. Artery numbing cheese? Definitely.

We called off "Operation: School Lunch" in the best interest of healthy eating after a bit of deliberation, but thought it appropriate to at least give you an idea where we were going with it. I understand that school lunches have changed a bit since my grade school days, or so Matty tells me. When I was in middle and high school, $.50 pop cans and $.75 pop bottles were plentiful, the lunches were tasty but fattening, and things were a bit more lax than they are now. Sound like it happened a while back? Not really... I graduated from high school only five years ago. I'm sure that today's nutritious metamorphosis enveloping schools is for the best, but I am a product of the days when no one seemed to care much about healthy lunches.. and their neglect was delicious.

*************************************************************************

In other news, speaking of Operation: School Lunch, Operation: Iraqi Freedom is over. I'm watching MSNBC right now and just witnessed the last U.S. convoy of combat troops cross out of Iraq into Kuwait. I'm sure a lot of people are breathing a sigh of relief and others are concerned about how things will look without our soldiers... however you look at it,  it's a historic moment.

Thursday, August 12, 2010

The Best of the School Lunch Menu, Part I: MEATBALLS! MEATBALLS!! MEATBALLS!!!

Around the time of our triumphant return to Ohio, Luke and I stumbled upon a rather glorious idea; an idea too exciting, heartwarming, and tasty-sounding to pass up.  We also realize that due to our prolonged absence, we managed to miss the anniversary of this fine blog's formation.  We are therefore retroactively declaring a prolonged Conquista-holiday!! And with it, a prolonged theme for the next few entries, similar to our Soup Month! (except we're not sure how long we can milk this thing, so we're not calling it a "month," per se.)

The theme, as you have probably divined from this post's title, is "The Best of the School Lunch Menu."  Surely you remember it*: there you are, sitting in class about to break for lunch. You lean across the desk to your friend and ask if he remembers what's for lunch today. "Uhh, I think it's walking tacos." And just like that, DING! Your day is suddenly that much brighter!
*Note: If you don't remember it, just trust us. It's good stuff.

The first item to be tackled (lovingly) was the humble meatball sub.  In true Conquistador fashion, we happened to find a bag full of precooked meatballs in the freezer, so we got some nice big Italian steak rolls on our next grocery visit.  Most houses usually have some tomato sauce of some kind sitting around (we used an 8oz can); apart from seasoning for your sauce, these three components are really all you need.  I regret that we did not make the meatballs ourselves.  It wouldn't have been difficult, but like I said, we used what we had.

The only part of this creation that really required any "cooking" was the sauce, so that is where we urge you to incorporate your own unique style and choice of seasoning.  It just so happens that our style usually involves Buffalo sauce. With a few pinches of sugar, several shakes of grated parmesan cheese, some ground black pepper and some Italian seasoning, our sauce turned out quite zesty indeed. 

Assembly of this meal probably doesn't need to be explained, but I will do so anyway.  Place some provolone slices in your buns and lightly toast them. (We used a toaster oven on the "keep warm" function.)  Once your sauce has been seasoned and heated, plop a few meatballs in your sauce pot and roll them around until they are nice and coated.  Place the meatballs in your sub(s); our steak rolls held four meatballs each.  Finally, spoon out the sauce that remains onto the meatballs, drenching them in zesty saucy goodness.  Here is a brief overview of our course of action:

1. Heat meatballs.
2. Mix and heat spices and sauce in saucepan.
3. Add a slice of provolone to each sub and lightly toast.
4. Combine.
5. Consume.

As you can see by the expression of sheer euphoria, the subs were quite a success.  We made them in the space of about 20 minutes, and the ingredients were not difficult to come by at all.  I would highly recommend this to anyone to make at any time; it's an exceedingly simple and supremely satisfying meal, and there is even some room for experimentation in the seasoning of the sauce.

Be prepared for the next exciting installment!  Seeing as we are bound by the unbreakable Conquistador Code of Secrecy, we cannot reveal what we're planning for our next venture.  Fortunately, the Code mentions nothing about leaving big obvious hints:

Tuesday, August 10, 2010

Summer Surf and Turf

Well, now that summer is essentially over, I guess it would be just about time for me to finally get something up on this site here!

I apologize in advance for the lack of organization of my post; I very rarely use anything that resembles a recipe and also generally fail to write down anything I do as I go along, so bear with me here. I also apologize for the formatting here. Luke's going to have to help me clean this up at some point.

Anyways, over the last few weeks, I had been having crazy person cravings for surf and turf. Yes, ladies and gentleman, surf and turf, that meal that does everything in its power to exude an air of decadence and gluttony and proves that we as American's have conquered both the wild plains and the deep blue seas. With our stomachs.


Anyways, the first thing you'll need to do with this meal is pick out your meats. I went with a pair of rib eye steaks from the local market. For those that are still learning meat cuts, rib eye (also know as Scotch fillets) are beef steaks cut from the rib section of the cow. Because of this, they are fattier and more tender (marbled) than other cuts (seen here, already marinated). They can be a bit pricey too. You'll also want to pick up some shrimp. I recommend going with a bag of small or medium shrimp to make preparation a bit easier. Large shrimp have to be deveined since their digestive tract may contain grit. In smaller shrimp this can be done for cosmetic reasons, but isn't mission critical. I also picked up some grilling mushrooms.

When you get set up, make sure to throw your shrimp skewers in a pan of water for about an hour so you don't wind up with shrimp torches. Next, I marinated the steaks in a large zip lock bag with some extra virgin olive oil, salt, pepper, Worcestershire, and crushed garlic in the fridge, while I skewered the shrimp and set up the grill. If you buy your shrimp frozen, you can thaw them in a bag placed in cold water.

When the grill is ready, go ahead and throw your steaks on over indirect heat for a few minutes. You'll want to have a jump on them before you add the shrimp, since the shrimp will cook crazy fast. When the steaks are moving along, throw on the shrimp skewers with whatever herbs you like (thyme and rosemary for me). The shrimp need to be turned often, so keep your eye on them. I also shook a little adobo on the shrimp as they were cooking.


For the mushrooms, brush lightly with oil, add some salt and pepper and grill on tin foil over indirect heat. Don't over cook them. Burnt mushrooms are SAD SAD things.

Once everything is finished, plate it up and serve. If everything went well, you should have pretty nice meal laid out here.

As far as pairings for this meal go, I'd say you're pretty safe with a darker amber lager or another heavy red meat beer. For wine, I picked a syrah by Francis Coppola. It was a little peppery with definite hints of blackberry and earth, but it went pretty well with the steaks. You can pick it up at any local grocer with a decent wine selection.

Well, that's all I have for now! Have fun with attempting this meal. The great thing about shrimp and beef is that you can do just about anything with them. Peace out, Conquistadors.

Saturday, August 7, 2010

Something Clever About Stuffed Peppers and Red Hot Lovin'

I never used to be a fan of stuffed peppers. I would come across them once a year or so, stare distastefully at the green blobs simmering in their own juices, and would do my best to avoid seconds. My Subway orders often included the words, "...and everything EXCEPT the green peppers".

We weren't friends.

As one grows older and (at least in my case) generally more adventurous, foods which were once shunned find their way into a diet. A great example: Brussels sprouts with bite.

When I learned that Erin would be coming to visit me for a few days back in late May, I was inspired to give stuffed peppers another shot. In searching for a recipe that we could make together (and in true Conquistador fashion, basing most of my decision off what I had in the refrigerator at the time), I consulted my Epicurious iPhone app. Bunch of zucchini? Check. Sweet Italian sausage that I best use up before leaving home for a couple of months? You know it. A red onion the size of my sister's head? Oddly, yes. Get some rosemary sprigs, a few big peppers, and we're in business. Done.


I'll go on a tangent for a moment - Epicurious, whether accessed via said iPhone app or Epicurious.com, is a great place to look up recipes when you have a general idea what you might like to try... or at least what main ingredients you have. I suggest checking out their site, some of our CulinaryFTW Twitter friends, or the other sites we have listed in the right-hand sidebar of the blog if you ever need suggestions.

While there are a lot of stuffed pepper recipes out there, the one that we made can be found here and originated in the May of 1999 Bon Appetit magazine issue as far as I can tell.

I'll leave the cooking instructions to the recipe author this time and focus more on our experience. While we didn't struggle with creating this dish, I will highlight one part of the instructions to which I wish we'd paid more attention... the stuffing can be PREPARED A DAY AHEAD! The required mincing, grating, and sausage skinning may not seem like much, but with a cook time of around an hour, you may not want to spend all of that time cooking at once.

The construction of the dish is not difficult once the stuffing is prepared - you basically mush everything up, stick it in a halved pepper, and bake it. Once out of the oven you can transfer everything to a plate and stick a few rosemary sprigs in for decoration... the result of which was Caesar Pepper once we were finished. A few roses for matching color, a bottle of Rieseling, and you have a romantic dinner.

The peppers were, in our opinion, delicious. We made two peppers (that is four halves, for those of you counting on your fingers), and it was more than enough... We could only eat three halves in one sitting. Presentation-wise, I thought they looked great as well - not the bubbling muck I remembered from my childhood. The idea of using red peppers instead of green was a new one for me, but worked. I have to wonder if one could use green, red, orange and yellow side by side for a neat presentation. Let us know if any of you do as I am curious now!

In the end, this was an all-around success. We may not have come up with the recipe ourselves this time, but if we made them without a struggle, you can too! The way I look at it, discussing culinary arts is as much about sharing good experiences with tasty recipes as it is about disseminating original ideas. We found the dish delicious; let us know your thoughts as well.

Sweet Red Peppers on FoodistaSweet Red Peppers

Tuesday, August 3, 2010

Some updates

Greetings, all -

We are FINALLY back from Maine! I realize that I probably stated that we'd be back in Ohio "soon" in a past entry, but things have been a bit... crazy lately. Between almost everyone getting an eye or ear infection during vacation and some extreme fluidity in travel plans, we arrived home not on July 15th, but on July 30th. Close, right?

Anyhow, while in Maine, to explain a bit about why so little action was evident here on the blog, we have a very small kitchen with very ancient cookware. Meals generally are collaborations with relatives and grocery stores are either quite far away or literally have two aisles, one of which is exclusively spam and Vienna sausages. It may seem that we've been our usual neglectful selves... but to be honest, there wasn't much in the way of gourmet cooking to write about.

Now for the good news. First of all, we're home and have a familiar kitchen and know exactly where to go for quality ingredients. Essentially, we can cook again. As far as availability, I still haven't been able to peg down a job yet, Matty still has a little while before school starts up for him again, and Deering ought to be in town soon. Regarding motivation, the rest of our family is headed off to visit our brother in Australia (where he is studying abroad) at the end of the week, meaning that if we DON'T cook, we don't eat. The future looks bright.

Another update to tell you about is that we've had some professional advice regarding the blog and how it ought to be operated lately. You can expect shorter, more reader-friendly posts (with links to our recipes so as not to clutter pages), more frequent posting, higher Twitter usage and more multimedia usage. We are hoping to do a few video / audio posts and are considering looking into starting a podcast... though that last part has not yet been determined.

If anyone has any input or advice of their own, don't hesitate to let us know either here or by Twitter, email, etc. We'll be back in touch soon!

Tuesday, July 13, 2010

PetitChef... Another Foodblogging Community

Our networking has really picked up in the last few days since we joined Foodie Blogroll... Last night we were also approved for and listed on PetitChef, a French-based food blogger community as well. We've also started linking posts to Foodista.Com, so we're breaking out of our shell little by little. We look forward to further networking and more cooking posts once we get back home to Ohio this weekend!

Friday, July 9, 2010

Foodie Blogroll... A Legitimate Recognition of the C.C.?

You may have noticed a new addition to the blog of late (I'll give you a hint... it's in the sidebar and has a tomato on it).

We've been accepted, after undergoing a manual review process over the past few weeks, to be listed on the Foodie Blogroll. We've decided it would be nice to both network with other bloggers who share our interests and to see if we can't exchange some ideas along the way. If you're interested, check the new widget to look at some of the other blogs listed and to view current foodie-centric articles.

We hope you like the network and look forward to exploring it ourselves!

Sunday, July 4, 2010

Where the Heck We Are

Howdy, guys.

So it's been a crazy few weeks lately... Torry, Matty and the rest of the family headed to Maine in early June, I headed to Missouri with Erin to do some mission work at a north St. Louis church for a few days, and we then proceeded to travel by way of Boston to now reside in northern Maine ourselves. It's been a lot of traveling but definitely a lot of excitement as well.

I must apologize, as a result, for the lack of entries you've seen lately. I've been on the road, Deering's been working in his chef-ly capacities, and Matty, well, Matty hasn't done much to be honest. I'll get on him about that.

The good news is that we haven't been totally useless... we have been cooking pretty regularly and have a few entries in the works - we simply haven't written them up. I'll hold up my end and write about the stuffed peppers Erin and I made and I know Deering will be writing about a surf and turf creation soon, anyhow.

In the meantime, I am currently working on making possibly our favorite, definitely our most re-created dish so far... the brussel sprouts that don't suck currently. They've been widely successful whenever we have served them in the past... today (being Independence Day - Go USA!!) we will be sharing them for the first time with the members of my mother's side of the family that live here in Maine during our July 4th celebrations. I have no doubts it will be a shockingly different taste for some... even if they don't enjoy them, however, I know I will *shrug*.

Thanks for bearing with us through the tumultuous last few weeks... we'll get back on the writing horse and not get TOO comfy during our vacation. Happy 4th of July!

Tuesday, June 15, 2010

Maintenance

Hey all.

You may have noted we haven't been around and that our blog template (again) took a plunge into the abyss and the site has been a wreck lately... hence the change in the way things look around here.

We think we've fixed everything, but Blogger has undergone some changes of late that ought to give us more leniency with multiple pages, profiles, and so forth. We're still exploring these changes may continue to be tweaked for a few days yet... we'll see. Thanks for your patience while we've battled through our technical ineptitude.

The good news is that Matty (finally) has something French to share with you! Standby...

~ Luke

Tuesday, May 25, 2010

What an Incredible Smell You've Discovered!

Never ever EVER volunteer to help clean refrigerators. Especially ones with vacuum condensers.

Monday, May 17, 2010

Fried K-sausage?

This, my friends, is my first post as a legitimate Conquistador but some of you may remember me as the man who brought you the "This Salad Don't Run" Hotdog Salad. Ironically enough, my first real project, a sort of impromptu idea as most all of our ideas are, again dealt with completely processed beef, prepared in a pan with the potentiality for usage on a grill. It was not complicated. It was not very unique. In general, it was not very great. Unless you really like hotdogs and want to try something different from your average cylinder of packed meat. We took a large roll of Hebrew National "Beef Salami", which was much more like Hebrew National "Processed Balogna", and decided that it was pretty bad so why not fry it?

We took an adorable little egg pan, put a slab of regular butter in it on the stove on medium to high temperature, and threw a piece of this salami on top. Within minutes, it began to brown a bit and smell a whole lot like a hotdog. After flipping a few times, it was done and ready to be tried. In my opinion, it was really just a big slice of hotdog with much more of a salty and flavorful nature than your average ball park frank. The salty nature of this food becomes an issue though, as in recent news, sodium has been under attack by health experts as one of the major factors which makes the childhood obesity (and adulthood obesity rate for that matter) constantly on the rise in America. In today's issue of TIME magazine, I came across the statistic that a single Hebrew National Jumbo hotdog will take up over 1/3 of the recommended daily value of sodium of an average person, at just over 2,300mg per dog. Really, the fact that I noticed a definite increase in sodium taste, which makes this slab of meat much more delicious than if it were not packed with salt, just makes this dish one more fatty snack to try. In general, not amazing. Just a fat hotdog. mmm.

Sunday, May 9, 2010

Culinary Conquistagloriousalsa!

Since it would have been entirely too convenient for me to share a Cinco-de-Mayo-related recipe with you before the holiday had come and gone, today I'm going to fill you in on how I celebrated on Wednesday and how our most recent culinary endeavor played into the festivities.

As you may or may not know, next Friday is my last day at the P.R. firm at which I have been interning since the beginning of the year. I've learned much more than I've earned, but I've had a great experience and am definitely coming out of the internship with a good bit of personal and professional development to show for it. It'll be a sad change in a lot of ways, but once you know that you are not going to be hired for financial reasons, it is time to move on.

Anyway, Wednesday (Cinco-de-Mayo) was the day of the Third Annual Salsa Challenge at the firm and I got talked into competing. I have never made salsa before, thus it seemed like a perfect challenge for a Culinary Conquistador... I couldn't just be that guy with a food blog who decided he didn't feel like competing.

In true last minute fashion, I went to my golf lesson on Tuesday at 7pm (realizing upon my arrival that they had scheduled me incorrectly and thus I ended up practicing on my own for a while) and then headed on to Heinen's at 8pm. Armed with a recipe which I had apparently cut out of a 2007 Gentleman's Quarterly issue and stuck in a cookbook, I was about to gather up the required fresh ingredients (plus a few additives of my own) and make it out before the store closed at 8:30.

When the GQ recipe page fell out of the cookbook that my mother was reference, I was excited for two reasons. First, I've generally had good luck with GQ-originating recipes in the past. Secondly, I thought to myself, "boy, writing this blog post ought to be easy... I can totally find it online and not have to type it all up!"

Guess I was wrong on the latter part.

For whatever reason, like a ghost-riding phantom drifting across the Mexican border to impart delicious, cryptic, tomato-centric knowledge upon me only to disappear forever into the sunset, I should have known that I'd never see so much as a mention of the recipe after the fact.

Well, alright, maybe that would have been a stretch. Regardless, I  have the original page of the bygone magazine issue and thus with a little extra effort can still relate to you the steps I took to make our salsa.

*~*~*~*~*~*~*~*~*~*~*

"Roasted-Tomato Salsa" modified to become...
THE CULINARY CONQUISTAGLORIOUSALSA!

Serves four to six (if that is all you're eating)

Ingredients
  • ~1 pound of on-the-vine tomatoes, cored
  • 2 Kumato tomatoes (they are brownish in color)
  • 6 Campari tomatoes (smaller, but larger than cherry tomatoes)
  • 3/4 lb. of tomatillos
  • 8 serrano chillies, stems removed
  • 5 cloves garlic, peeled
  • 1/2 large red onion, thinly sliced
  • 1/2 cup vegetable oil (plus a little extra)
  • Salt
  • Sugar
  • 1/4 white onion, chipped
  • Handful of cilantro, stemmed and chopped
  • 1 lime
Directions
1. Preheat the oven to 400 degrees.

2. Toss tomatoes (all) tomatillos, chilies, garlic, and sliced (red) onion with a small amount of oil in a roasting pan, season with salt, and then roast until soft and wilted (about 30-45 minutes... check @ 30 min). If you want a bit of char on the vegetables for added flavor (you do), roast the tomatoes, tomatillos, and chilies in sperate pans over high heat before placing them in the oven.

3. Once the ingredients are roasted (again, they should be soft and somewhat wilted), let them cool a bit then puree in a food processor, slowly adding the 1/2 cup of oil. This will help to emulsify the salsa. Season to taste with salt and a pinch or two of sugar (I went heavier on the salt as I like the taste).

4. Mix in the chopped raw (white) onion and cilantro. Cut your lime in half, juicing half and mixing the juice in with the salsa. Cut the other half into 6 wedges (see picture) to be used by individuals who may want to further flavor their salsa... besides, it looks cool as a colorful decoration.

5. Serve with warm tortillas or good-quality tortilla chips. Preferably cold beer or margaritas as well.

*~*~*~*~*~*~*~*~*~*~*

And that's what I did. It took a while... it was a bit more... viscous than anticipated and was also orange vs. the red salsa in the picture for one reason or another. The taste, which was the important part, was great.

The office shut down at 4pm on Wednesday and the "Creative Team" area became a Mexican eatery. We ended up having 13 entries in the competition and Lisa's husband came and tended bar with top shelf tequila-made margaritas and Coronas. It was a blast; all of the salsas were very different (ranging from chunky mango ones to smoky fine chipotle blends) but all very good. Everyone had a chance to submit one vote for their favorite of the thirteen... I'd say 25-30 folks voted.

The Culinary Conquistagloriousalsa did receive a couple votes for best salsa, however the top award went to a woman named Kris who used special smoked peppers from a brother-in-law in Arizona and herbs she'd grown in her own garden. Where my salsa was orange, hers was a deep brown and tasted as smoky as it looked. It deserved the win... and the festive giant chili pepper plate that went with the title.

Looking at my salsa, I have to say I was pretty happy with the results. I'll warn you now that it is pretty spicy... serrano peppers are up there in the heat index. Not TOO spicy; some sauces or chilies that I've had over the years leave a lingering, hurt-your-tongue burn. This chili has a crescendoing heat effect... You eat some and feel nothing at first, slowly gaining a "kick" over the first 15 seconds or so. The spiciness lingers for a minute or two, but recedes as quickly as it came. I nice touch, but nothing to lament afterward.

The taste was interesting. While the texture may have been less "meaty" than I had expected, the salsa was full of flavor and complexity. Everyone was very complimentary of it while sampling all the salsas, and Matty / the rest of our family was quite impressed when they tried it the next day.

In the end, I am glad that I competed. It was a chance to make a vegetable-only dish, use the freshest of ingredients, and come out with a big success on the first try. If you're looking to try your hand at a from-scratch salsa anytime soon, give strong consideration to the Culinary Conquistagloriousalsa.

Saturday, April 24, 2010

Captain Candy's Catastrophic Chili: One Big Bowl O' Birthday Fun

 As I mentioned not long ago in my last entry, I've been doing a decent job of keeping our Twitter presence up. If you were monitoring our feed today, you may have noted that it is Matty's 17th birthday today. I, being the thoughtful older brother that I am, neglected to get him anything of significance.

Hey, they don't pay me right now at my job... and I don't think ahead. As you can likely tell by his shirt, he got plenty of awesome presents as it was.

As the day has gone on and I've given the subject more thought, however, I realized that I could give him the greatest present of all: stress-relief.

You see, I have been prodding Matty for close to two months now to post our award-winning chili recipe on the blog. He's been either too busy or too unmotivated thus far to do it... and it's keeping him from contributing. I figure that if I take the burden off his shoulders, guess what on Earth we put in the chili, and get a post up, it'd make his day. A great side-effect? It'll surely make your day too.

That being said, here it is. The big one. That which our blog's measly reputation hinges on: Captain Candy's Catastrophic Chili.

"If the recipe is that good," you might think, "why share it with us lowly peasants lurking in the blogosphere?"

A good question, but one that is easily answered. Since we waited forever and a day to actually post this recipe, measured things... less than accurately, and hardly remember what we put in to begin with (I wish you could see this crumpled, pencil-scrawled sheet of paper in front of me), I don't think we're in any danger of losing a fortune on this one. Besides, we only actually took the 2nd place medal (out of 14 entries), our egos have been kept in check for now.

To be honest, the chili wasn't even our idea. Our church hosts a "Chili Cook-off" every year, and every year you know where to find us when that day comes around...

Not at the cook-off.

We don't have great memories, so we've never quite made it there. This year, however, we didn't have too much of a choice. The pastoral associate at the church, a very bright guy named Bill, knew about the Culinary Conquistadors and knew that we had a bit (keyword being BIT) of cooking experience. He hounded us week after week about when he was gonna see our name on the entries list and how he couldn't wait to try that Conquistador chili. He wasn't being obnoxious, just probably knew that we didn't have the gumption to enter ourselves.

Finally, without Matty's permission, I put our names on a slip and we were in the running.

When that fateful weekend came around, we hit the store, grabbed some ingredients, and went to work. given how long ago it was that we actually made the chili, I'll skip the faulty narrative and stick to the phases of preparation. Here is how it all went down.

~*~*~*~*~*~*~*~*~*~

Captain Candy's Catastrophic Chili

Serves: ???? (a crock-pot's worth)
Cook Time: ~6 hours (though you won't be present the whole time)

Phase I: Meat and Flavorings
  • What you'll need
    • Coarsely ground beef (2.5 lbs+)
    • Bulb of garlic (6 cloves)
    • Salt & Pepper
    • Onions (1.5 cups+)
    • Olive oil (a few Tbsp. to cover the electric frying pan
  • Preparation
    • Thaw the beef, chop it up. Keep it chunky. Microwave, hot water, whatever you need to do to make sure it's not frozen and can be worked with.
    • Chop up your onions. We diced them, but not finely. pieces were probably 1/2 in. long.
    • Crush your cloves of garlic. We used a garlic press, I recommend one if you can find it
    • Add oil to electric frying pan, turn to 300°F. Heat oil.
  •  Cooking
    • Put beef into the electric frying pan / heated oil. 
    • Add prepared garlic and onions
    • Salt and pepper to taste
    • Allow the mixture to cook for a few minutes until the beef and seasonings are browned
Phase II: Vegetables
  • What you'll need
    • Variously colored bell peppers, the more colors, the more fun (1.5 cups+)
    • Celery, chopped (1.5 cups+)
  • Preparation
    • Chop that business. Like onions, don't go too fine.
  • Cooking
    • Drain meat and seasonings
    • Add new oil to frying pan
    • Add chopped vegetables
    • Sauté vegetables for 5 min. or until soft
Phase III: Beans, Spices, Etc.
  • What you'll need
    • Kidney beans (40.5oz. can)
    • Dark red kidney beans (30oz. can)
    •  Can of tomatoes with oregano, basil, and garlic (28oz) [You may want to try the kind with diced green chilies in it as well]
    • Spices
      • Oregano
      • Ground black pepper
      • Basil
      • Chili powder
      • Hot paprika
      • Cinammon
      • Crushed red pepper 
  •  Preparation
    • Drain beans
  • Cooking
    • Add drained beans to vegetables in electric frying pan
    • Add seasoned tomato mixture
    • Stir, add spices to mixture. Now I realize that we haven't given you any measurements, but honestly we didn't measure it either. You've just got to work with what you have and guess a bit along the way. We continually tweaked the spices toward the end to equalize spiciness, saltiness, sweetness, tartness, etc. to meet our qualifications. We'll come back to this... just put in a couple shakes for now and try not to overdo it.
Phase IV: All Together Now!
  • Combination
    • Add everything, meat, vegetables, etc. to crock pot
    • Simmer the mixture for several hours (4-5 hrs.) The flavors need to "become acquainted", as one of our aunts likes to say. Don't bother taste testing for a while.
    • We kept a bit of overflow simmering in the electric frying pan for testing purposes... we had very little faith in ourselves and wanted to avoid polluting the whole batch if possible. You may want to try this too
Phase V: Hittin' the Sauce - Finishing Touches
  • What you'll need
    • Buffalo sauce (We used a brand called "Moore's", 16oz.)
    • Frank's Hot Sauce
    • Srirachi asian hot sauce
    • Limes (two)
  • Mixing it up
    • Juice both limes, add the juice to the chili
    • This is where any semblance of a scientific approach falls apart. We added the entire bottle of buffalo sauce, squirts of Frank's and srirachi, and fiddled with cinammon, hot paprika, and chili powder. Here are some pointers:
      • The lime juice and cinammon add a sweetness to the mixture with a bit of tartness from the limes
      • Srirachi sauce adds spice, but almost a little sweetness as well
      • Frank's has more distinct flavor than the srirachi sauce, thus adding more spice that equalizes the sweetness
      • Chili powder, hot paprika, and crushed red pepper all add spice
      • Salt and pepper are useful for normalizing any oddities
    • Pray that it works out and don't give up until you find a flavor you like
~*~*~*~*~*~*~*~*~*~

... Or something like that.

It wasn't exact, it wasn't elegant, but it was pretty dang good. For once, you don't even have to take just our word for it either.

What we learned from all of this is that chili is something that is meant to be toyed with and is hard to mess-up. As long as you have a consistent base with the beef and vegetables, your originality will come from how you season it. In our case, the limes and srirachi are what really made the difference, I believe.

You don't even have to use beef if you want to try something different. The chili that took number one in the cook-off was a green chili-based, shredded chicken chili. It was made by a woman who was a much more accomplished cook than we and was thus a tasty departure from the norm. If you're confident, try something crazy!

Now that it's Spring, chili-season may have passed for the most part... but if you're looking fora different spin on a recognized classic, we suggest giving this one a try. Captain Candy has never let anyone down... at least not yet.